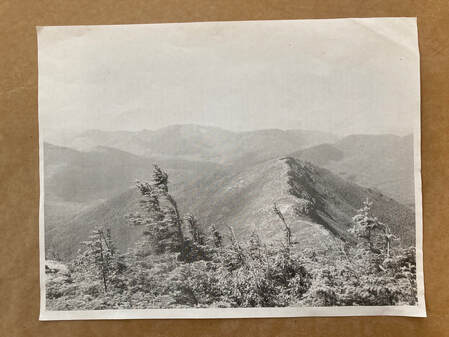
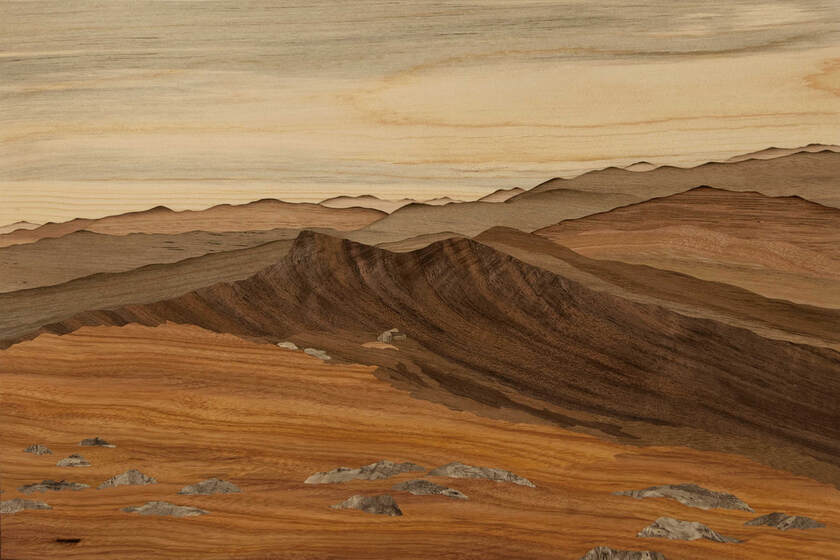
CRAIG ALTOBELLO, "Bondcliff, from Mt. Bond"
“Bondcliff from Mt. Bond” was inspired by a fond memory of backpacking with my wife in
the White Mountains during the summer of 2010. It’s a long hike to reach these mountains in one day so before the climb we made a “leave no trace” campsite in a secluded spot near a beautiful flowing stream. Early the next morning as we reached Mt. Bond, I looked back to see Bondcliff’s pyramid shape rising above the trees. Immediately I felt a deep connection. This is one of my favorite places to be, high on a rocky ridge above the tree-line. As my attention shifted to what was right in front of me,
I was immediately drawn to the wind-shaped, gnarled spruce trees.
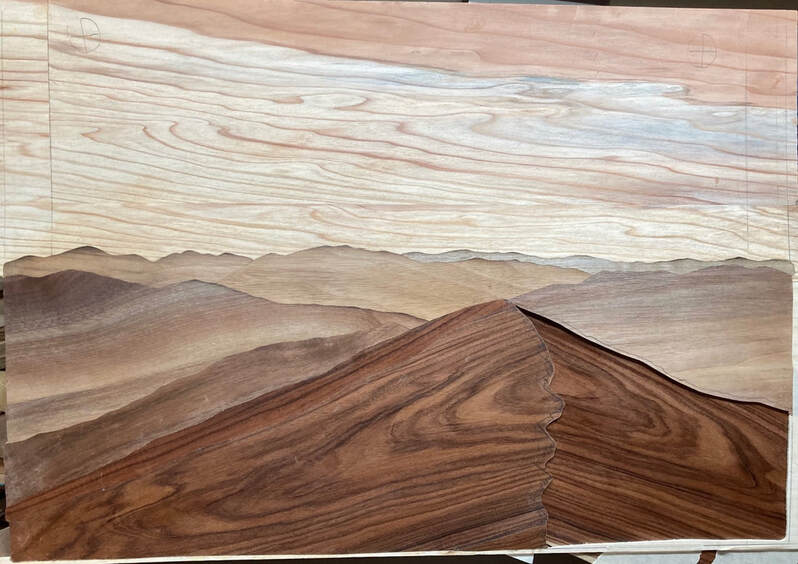
In this piece I wanted to convey the character of the ridge on Bondcliff and the sculpted spruce trees in the foreground. At first, I tried to show the cliffs on the right side of the mountain, but a side view of the cliffs was just too challenging to capture in wood. I took the cliffs out and began to rethink my approach. You will notice in the photograph of Bondcliff there are shadows coming off of the cliffs. I decided to let most of the right side be in shadow and use a lighter wood to suggest the exposed rock along the ridge-line. This wood is from a piece of black walnut where the sapwood and the heartwood meet and unusual color often occurs.
One of the pleasures I get from making art, and this piece in particular, is creating a miniature world
that I can place myself in. I can feel the warmth of the sun and the wind on my face
as I walk along the spine of Bondcliff.
the White Mountains during the summer of 2010. It’s a long hike to reach these mountains in one day so before the climb we made a “leave no trace” campsite in a secluded spot near a beautiful flowing stream. Early the next morning as we reached Mt. Bond, I looked back to see Bondcliff’s pyramid shape rising above the trees. Immediately I felt a deep connection. This is one of my favorite places to be, high on a rocky ridge above the tree-line. As my attention shifted to what was right in front of me,
I was immediately drawn to the wind-shaped, gnarled spruce trees.
In this piece I wanted to convey the character of the ridge on Bondcliff and the sculpted spruce trees in the foreground. At first, I tried to show the cliffs on the right side of the mountain, but a side view of the cliffs was just too challenging to capture in wood. I took the cliffs out and began to rethink my approach. You will notice in the photograph of Bondcliff there are shadows coming off of the cliffs. I decided to let most of the right side be in shadow and use a lighter wood to suggest the exposed rock along the ridge-line. This wood is from a piece of black walnut where the sapwood and the heartwood meet and unusual color often occurs.
One of the pleasures I get from making art, and this piece in particular, is creating a miniature world
that I can place myself in. I can feel the warmth of the sun and the wind on my face
as I walk along the spine of Bondcliff.
Marquetry Process
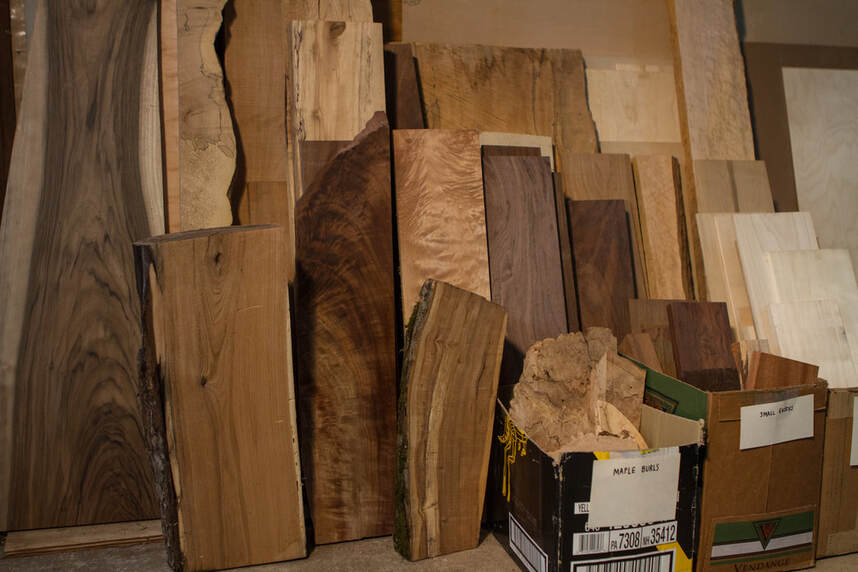
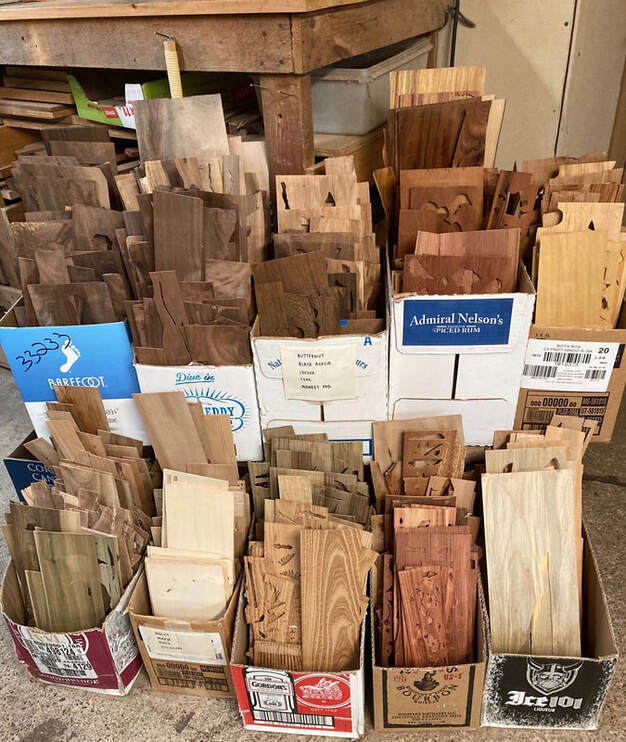
Marquetry is the art of assembling thin slices of wood to form an image. I do not use any stains or dyes,
just the natural color of the wood. By sawing my own veneer, I can use woods from local New Hampshire trees, responsibly cut woods from distant places, scraps from other woodworkers,
and lumber milled from storm-damaged trees.
just the natural color of the wood. By sawing my own veneer, I can use woods from local New Hampshire trees, responsibly cut woods from distant places, scraps from other woodworkers,
and lumber milled from storm-damaged trees.
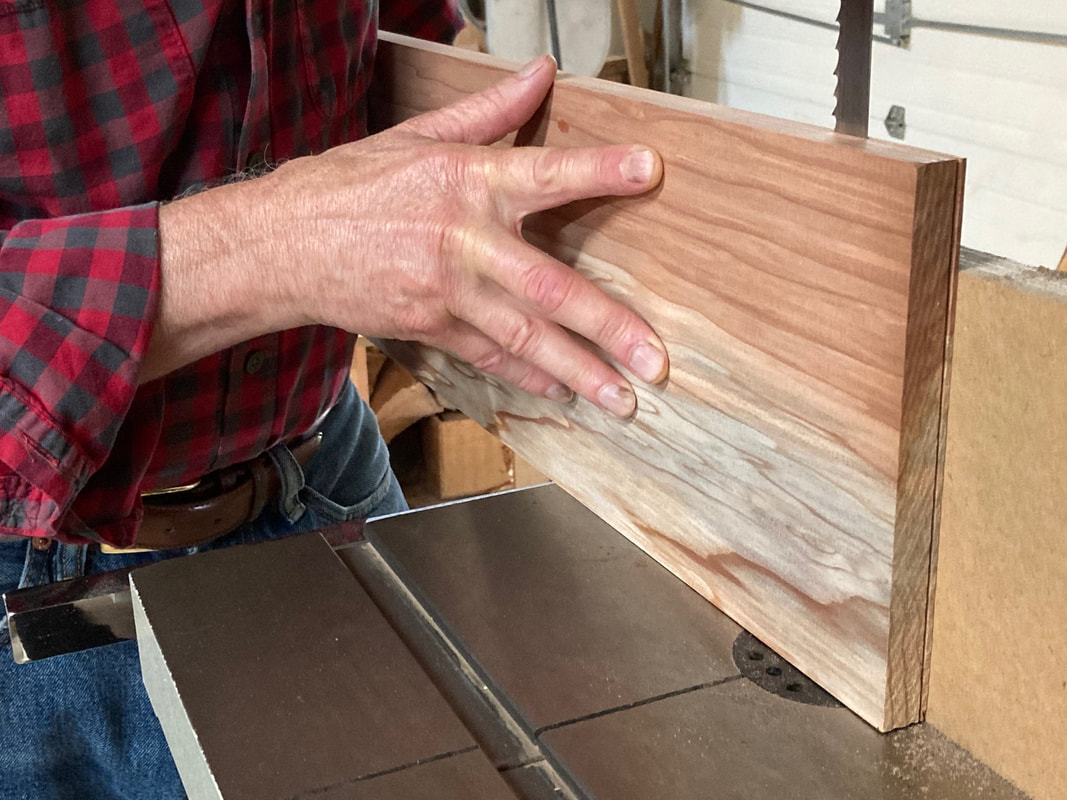
1.
|
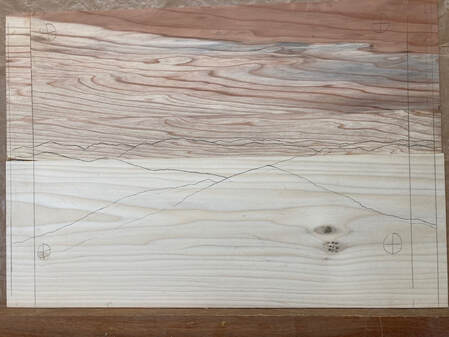
I cut lumber into thin slices with a bandsaw (1/16”) and begin a landscape by searching for wood that suggests “sky”. The wood that I used for the sky in ”Bondcliff” is cut from salvaged redwood. The sky is then glued to poplar, which serves as a temporary background and will be replaced by the inlay woods. |
|
2.
Typically, my drawing flows from my sketchbook to tracing paper. Then using carbon paper the composition is transferred to the wood background panel. To save weight on this backpacking trip I just brought a camera and used one of my photographs as the inspiration for my own composition. As you can see in the next photo I did not transfer all of the drawing to the wood panel at once. This is because everything but the sky
would be replaced with a different wood used for the mountains.
Once the mountains were in place the trees were drawn on the panel
would be replaced with a different wood used for the mountains.
Once the mountains were in place the trees were drawn on the panel
|
|
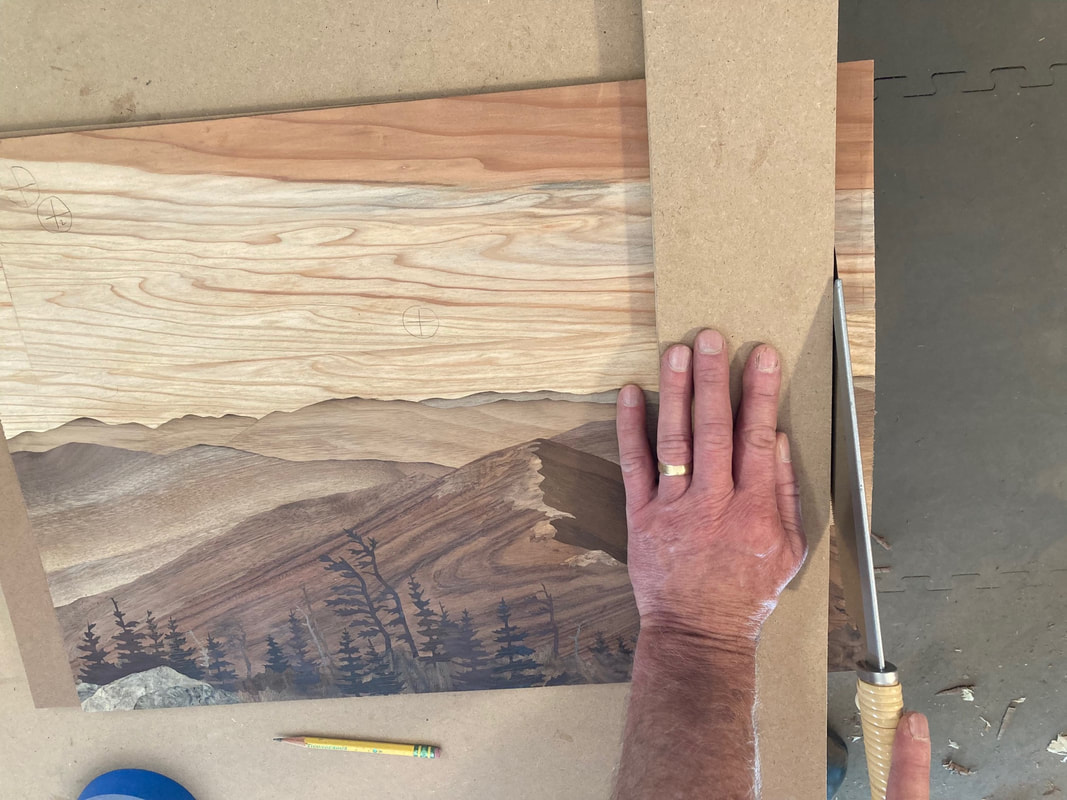
3.
In my landscapes an essential step is to match the character of the wood with the contour of the mountains. To do this I cut a “window” into the background panel so that I can try out various grain patterns to find the best match. Look closely on the right side of “Bondcliff”. You will notice that I have cut a “window” in the panel slightly smaller than the actual pencil line where I will cut. The rosewood that I have selected
for the mountain is taped in place underneath the panel.
Now I am ready to cut along the pencil line through the two layers of wood.
for the mountain is taped in place underneath the panel.
Now I am ready to cut along the pencil line through the two layers of wood.
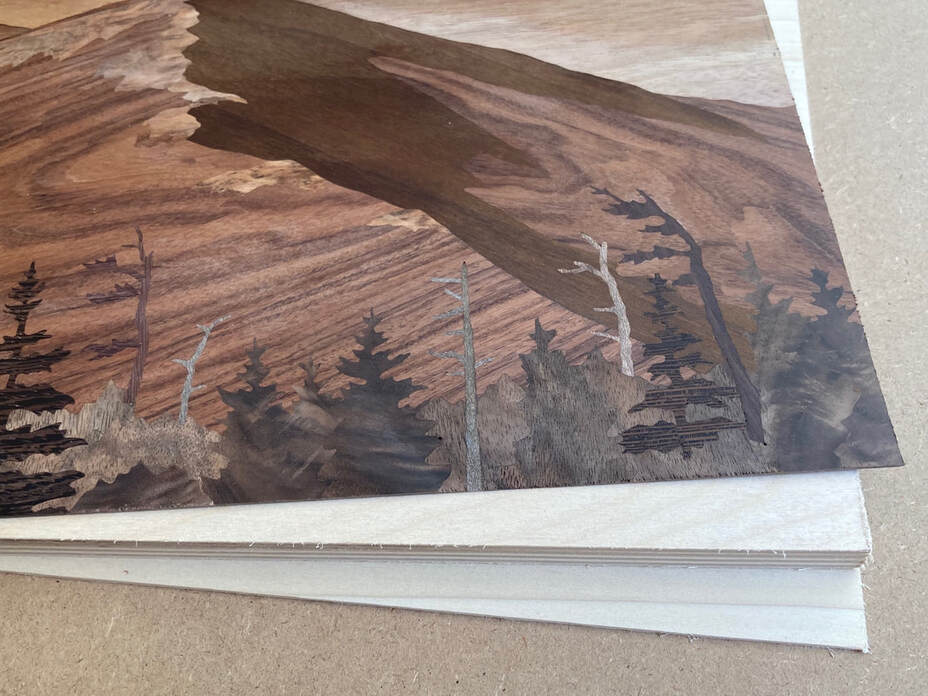
4.
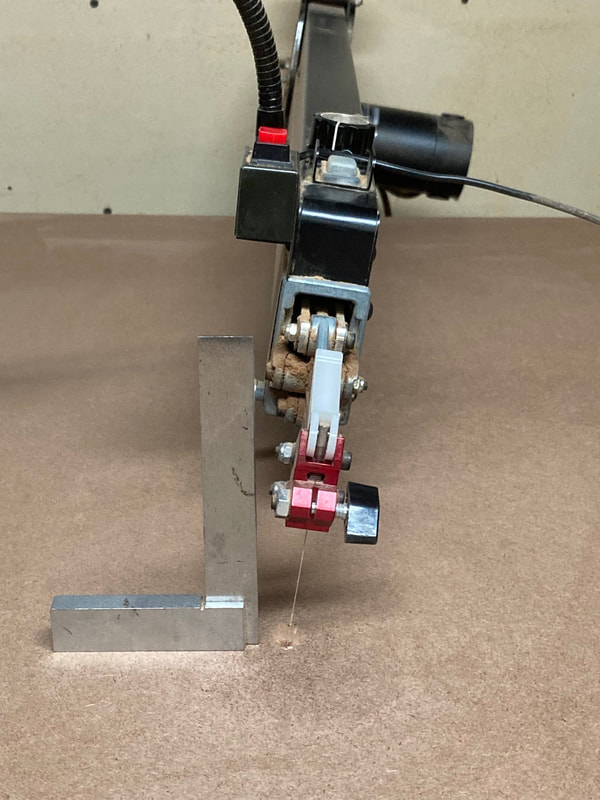
To create a precise fit with no gaps I select a veneer and tape it underneath the panel. Then I drill a tiny hole through both layers, thread the saw blade through it, and cut BOTH LAYERS at the same time on the scroll saw. With the saw set at an angle, the result is that both the inlay piece and the background panel have beveled edges and fit perfectly together.
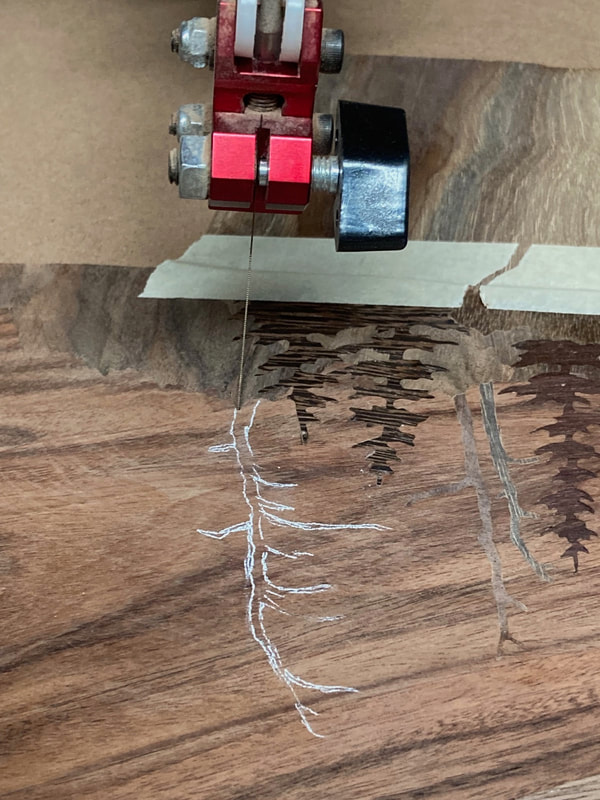
Once the piece is cut I apply some glue to the inlay piece and tap it into place from the back of the panel. In the photo I am about to cut one of the trees. I taped the inlay piece underneath the panel, drilled a hole to thread the saw blade through, then I will cut both pieces along the white line.
Once the piece is cut I apply some glue to the inlay piece and tap it into place from the back of the panel. In the photo I am about to cut one of the trees. I taped the inlay piece underneath the panel, drilled a hole to thread the saw blade through, then I will cut both pieces along the white line.
|
|
5.
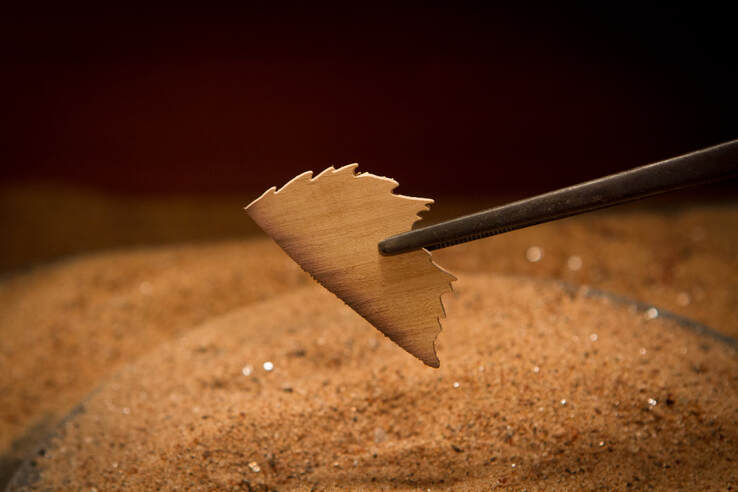
To add visual depth, I sometimes dip an inlay piece in hot sand on a hot plate to darken an edge.
You can see evidence of "sand shading" in a some of my landscapes especially on distant mountain ridges
. I use this technique primarily when making birds and flowers to give them a more 3-dimensional look.
The photo shows the technique in action when making a leaf.
You can see evidence of "sand shading" in a some of my landscapes especially on distant mountain ridges
. I use this technique primarily when making birds and flowers to give them a more 3-dimensional look.
The photo shows the technique in action when making a leaf.
6.
|
With landscapes I often like to continue the image onto the sides of the piece. I cut the ends of the thin completed image with a Japanese dovetail saw. The edge pieces will eventually get glued to the sides. |
|
7.
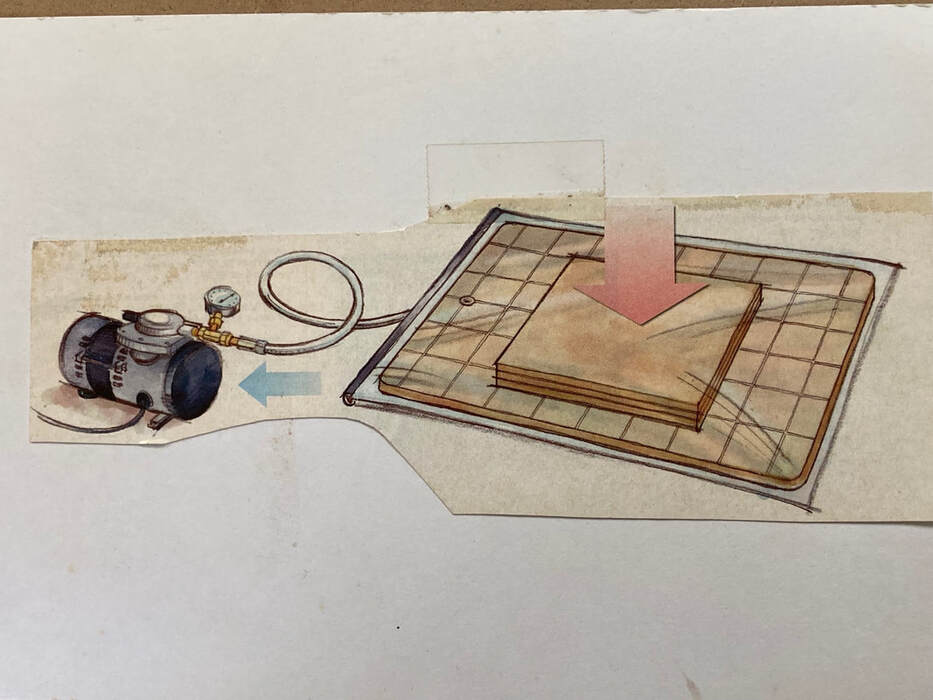
I glue the landscape to a stable layer of plywood and a backing of hardwood.
To glue the three layers together I use a vacuum press, which consists of a vinyl bag with a pump attached to evacuate the air from the bag. It produces a surprising amount clamping pressure
(about 1750 pounds of pressing force per square foot). In the photo illustrating the vacuum press
the artwork is sandwiched between layers of flat material.
(about 1750 pounds of pressing force per square foot). In the photo illustrating the vacuum press
the artwork is sandwiched between layers of flat material.
8.
|
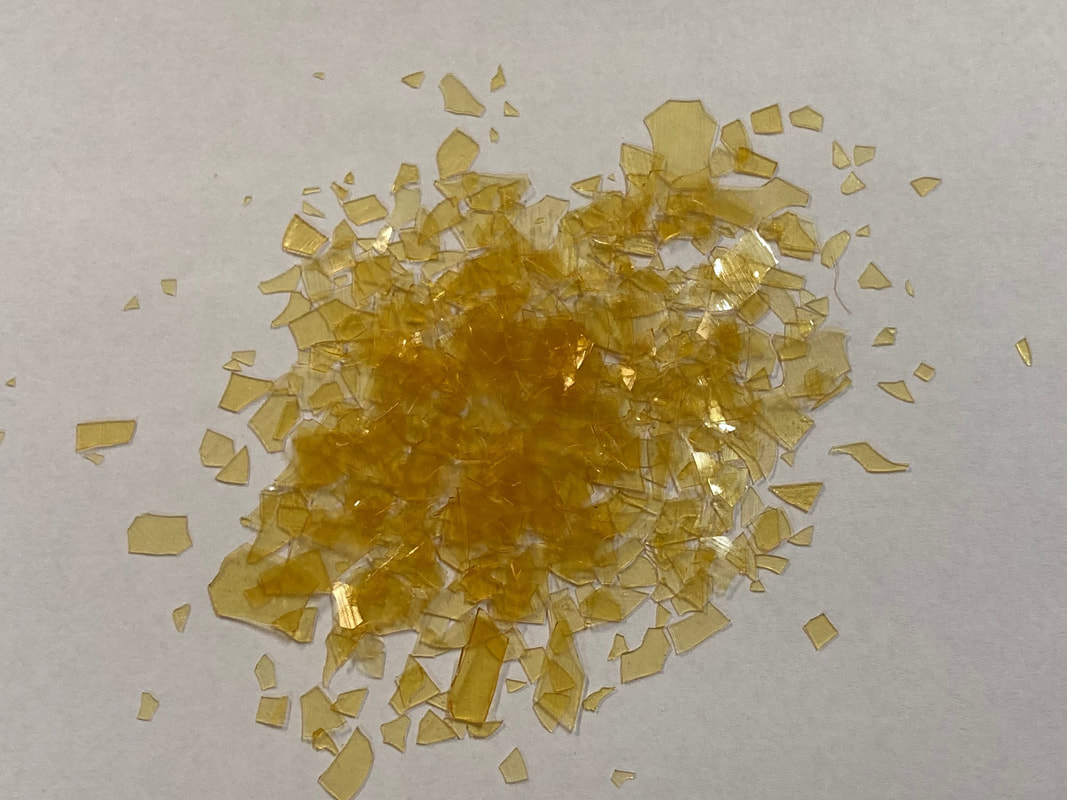
The clear finish I put on each completed piece is shellac. I mix shellac flakes with alcohol in small batches for a fresh finish. This shellac is made from the secretions of the lac bug. The final coat is beeswax polish. |
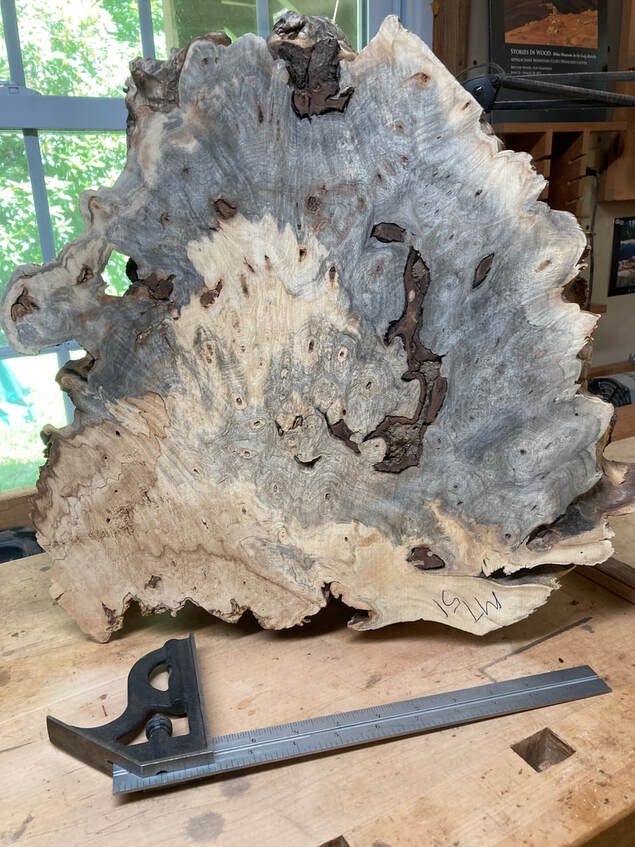
“This is a cross-section of a buckeye burl from a tree native to California.
All three White Mountain landscapes in this "Process" exhibit include buckeye burl as part of my palette.
All three White Mountain landscapes in this "Process" exhibit include buckeye burl as part of my palette.
Similar Stories
Mt. Monroe from Mt. Washington, 11" x 16”
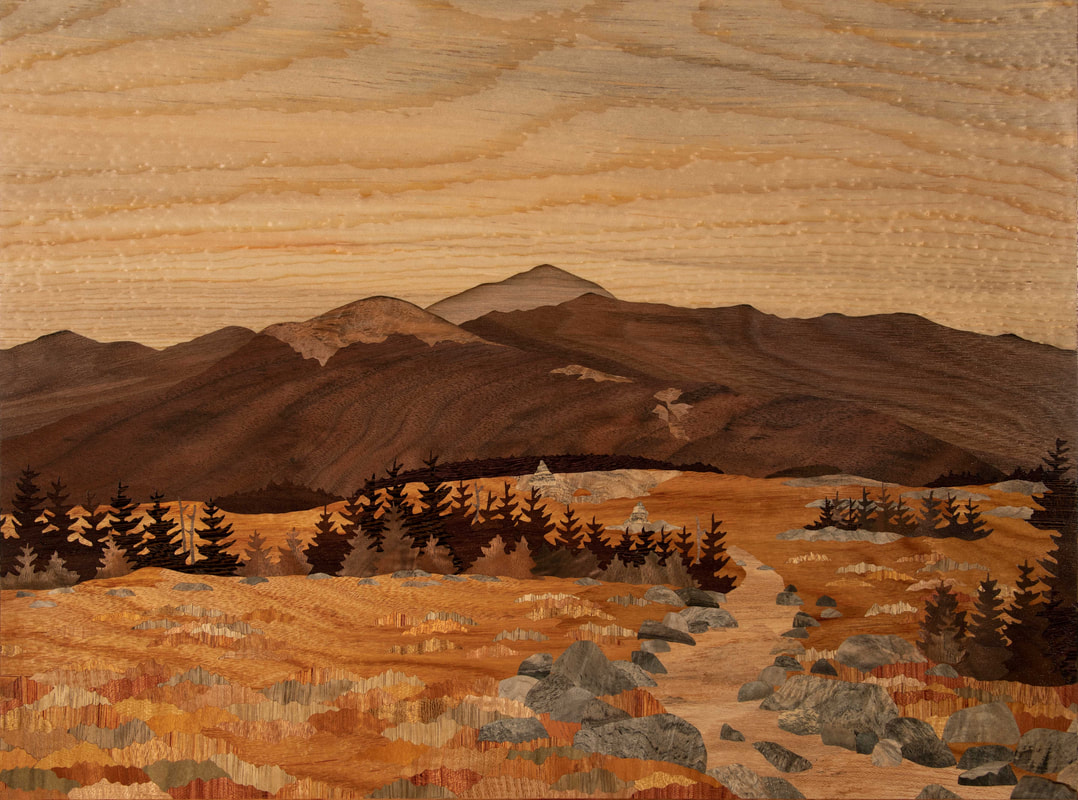
Following the Crawford Path Along the Backbone of the Presidential Range
15" x 19"
15" x 19"
